Player Prefab Configuration
To spawn a Local Player, we first need a properly configured prefab. The Local Player component extends Game Creator 2's Character functionality by enabling multiple characters to be controlled simultaneously with different input devices.
Basic Setup
Follow these steps to create a multiplayer-ready character prefab:
-
Create a Character
- Right-click in the Hierarchy
- Select Game Creator → Characters → Character
-
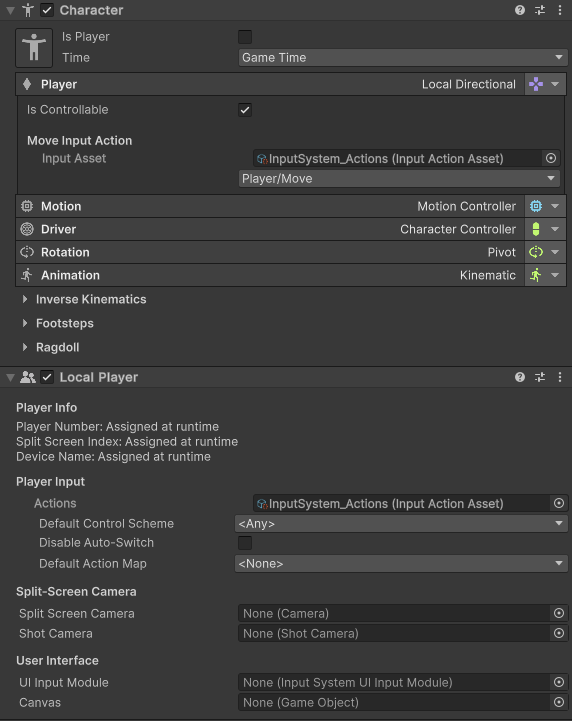
Add Local Player Component
- Select the Character in the scene
- Click Add Component and select Game Creator → Characters → Local Player
-
Configure Movement
- On the Character Player kernel, select the Local Directional input
-
Setup Input
- Assign the same Input Action Asset to both the Local Player and Character components
- Ensure your movement action outputs a Vector2 value
-
Create Prefab
- Drag your configured GameObject to the project window to create a prefab
Pre-configured Examples
Check out the included Examples and the Players Example from Game Creator's example collection for pre-configured prefabs to get a jump-start on your project.
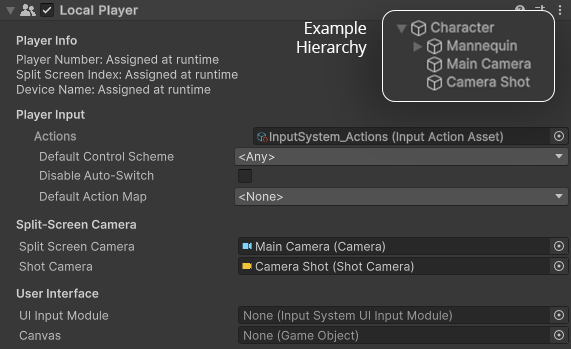
Adding Split-Screen Camera
If you plan to have split-screen active for the player, you will also need to configure their Camera and Camera Shot:
- Add a Main Camera as a child of your player
- Add a Camera Shot as a child of your player
- Assign the Camera Shot as the Current Camera Shot on the Main Camera
- Assign both the new Camera Shot and Camera to their respective fields on the Local Player component
Controlling the Camera
To allow a Local Player to control a Camera Shot, you will need to use the Shot Input Bridge component. See Shot Input Bridge for more information.
Input Requirements
Your Input Action Asset should include:
- Vector2 actions for movement - Configure proper movement controls
- Appropriate control schemes - Set up Keyboard, Gamepad, etc.
- Properly mapped input actions - Ensure all actions are correctly assigned
Movement Action Configuration
The movement action must output a Vector2 value. The Players Example includes a pre-configured Input Action Asset that you can use as a reference or starting point.
Troubleshooting
Common setup issues and solutions:
- Input not working: Ensure the Input Action Asset is assigned to both the Character's movement unit and the Local Player component
- Movement issues: Verify the movement action is configured as Vector2 and that Local Directional movement type is selected
- Control scheme problems: Check that your control schemes are properly configured in the Input Action Asset